This post may contain affiliate links. Please read our disclosure policy.
Ready in under 20 minutes, these crunchy and delicious baked pita chips are the answer to all of your healthy, crunchy, salty snack prayers!

The only thing better than a homemade, crunchy, salty chip is a super quick and easy homemade, crunchy, salty chip! That’s why I’m sharing this recipe with you; because you deserve to have these salt-tooth satisfying crunchy chips in your life in 20 minutes or less.
The added bonus, (as if you need one) is that while these little babies are baking, your entire house will smell as though you have a loaf of fresh bread in the oven. The aroma will have your loved ones flocking to the kitchen; I know because witnessed it myself yesterday as I baked up a batch of these glorious pita chips!
Why this Recipe Works:
- You’re free to choose your own pita (whole wheat, gluten-free, regular, etc.) so you’re able to make the pita chips of your dreams.
- These chips require and therefore contain very minimal oil, unlike many store bought pita chip brands.
- Another bonus: Clean up is almost non-existent!
What goes well with these pita chips?
- These salt and pepper chips go deliciously well with my Homemade Garlic Hummus, my Sun-dried Tomato Hummus, my Lighter Guacamole, a smoked eggplant dip, or all by themselves.
Looking for other easy snack ideas? Then you have to try my:
- Lighter Maple Kettle Corn
- Sweet n’ Salty Chunky Vanilla Almond Butter
- Roasted Buffalo Cauliflower
- Ultimate Craving Crusher
How to Make Crunchy Salt and Pepper Pita Chips:
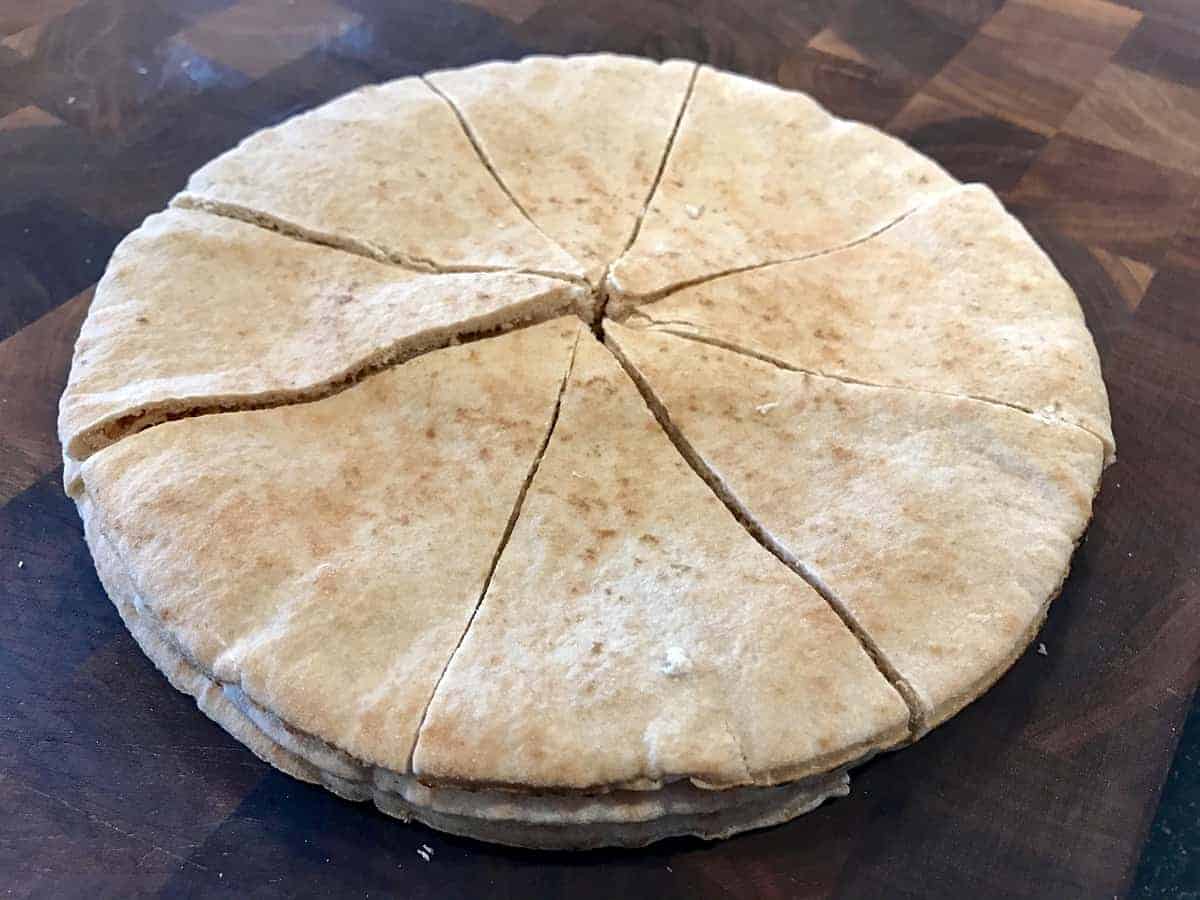
1. First, preheat your oven to 400°F/200°C. Then, cut each pita into 8 triangles.

2. At this point, you have a choice: would you like thicker, heartier pita chips or slightly thinner and crispier pita chips? If you want thick/hearty, leave the triangles as they are. If you’d like thinner/crispier, carefully separate the pita triangles so that they are no longer double stacked.

3. Next, lay those triangles down in a single layer on a parchment-lined baking sheet. No parchment, no prob! Any nonstick baking sheet will do as is.
4. Drizzle the 1 Tb. olive oil or avocado oil evenly over the pieces and then use your finger tips to rub the oil over both sides of every triangle. Then, spread them out over the baking sheet to create one single layer.
5. Lastly, sprinkle salt and pepper evenly over one side of the pita pieces.
6. Pop those lil’ chips-to-be in your preheated oven. If you’re making the thicker chips, bake for about 15 minutes or until the edges are browned. For thinner chips, bake for about 8-10 minutes. Watch closely to make sure they do not burn.
Once they’re cool enough to handle, take a nibble to make sure your salt and pepper level is on point. Add extra as needed. FYI – some parts may be a little chewy fresh out of the oven, which isn’t necessarily a bad thing, but they will become crunchier as they cool.
That’s all there is to it!

I hope you love these pita chips as much as we do!
Top Tips for Making Crunchy Salt and Pepper Pita Chips:
- Want to change up the flavors? Try adding some garlic powder or even chili powder or blackening spice for a little bit of a spice. Feel free to get creative!
- Using a salt that’s on the coarse side is not necessary, but it will add a little something special to these chips.
- To make clean up even easier, you can find those flat, pre-cut parchment sheets HERE
Did you try this recipe? Please give it a star rating and let me know what you think in the comments below. Your feedback is very helpful! Thanks in advance.
Did you make this? If you snap a photo, please be sure tag me on Instagram at @AudreyDunham or hashtag #AudreyDunham so I can see your creations!

Crunchy Salt and Pepper Pita Chips
Ingredients
- 3 pitas I used whole wheat
- 1 Tbsp. olive oil (15 ml)
- salt to taste
- pepper to taste freshly ground, if possible
Before You Begin! I recommend measuring out all ingredients called for in this recipe so they are ready to go the moment you need them.
Instructions
- First, preheat your oven to 400°F/200°C. Then, cut each pita into 8 triangles.
- At this point, you have a choice: would you like thicker, heartier pita chips or slightly thinner and crispier pita chips? If you want thick/hearty, leave the triangles as they are. If you'd like thinner/crispier, carefully separate the pita triangles so that they are no longer double stacked.
- Next, lay those triangles down in a single layer on a parchment-lined baking sheet. No parchment, no prob! Any nonstick baking sheet will do as is.
- Drizzle the 1 Tbsp. olive oil or avocado oil evenly over the pieces and then use your finger tips to rub the oil over both sides of every triangle. Then, spread them out over the baking sheet to create one single layer.
- Lastly, sprinkle salt and pepper evenly over one side of the pita pieces.
- Pop those lil' chips-to-be in your preheated oven. If you're making the thicker chips, bake for about 15 minutes or until the edges are browned. For thinner chips, bake for about 8-10 minutes. Once they're cool enough to handle, take a nibble to make sure your salt and pepper level is on point. Add extra as needed. FYI - some parts may be a little chewy fresh out of the oven, which isn't necessarily a bad thing, but they will become crunchier as they cool.
Pro Tips From Audrey
- Want to change up the flavors? Try adding some garlic powder or even chili powder or blackening spice for a little bit of a spice. Feel free to get creative!
- Using a salt that's on the coarse side is not necessary, but it will add a little something special to these chips.
- To make clean up even easier, you can find those flat, pre-cut parchment sheets HERE
This post may contain affiliate links. Please read our disclosure policy.
How long will these keep
About two weeks in an airtight container!
Can’t wait to try these!